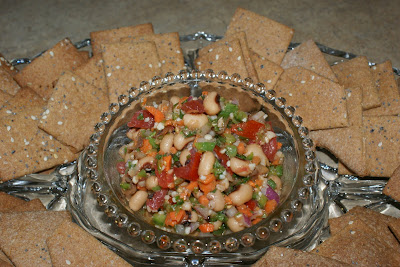
I got going on the crackers only to find that another trip to the store was in my future. I didn't have the instant yeast that it called for. When I returned, I got down to business and mixed up the lavash dough. It looked much more complex on paper than it really was. I let the dough rise for about a hour and a half and then rolled it out. I placed it on parchment paper on a large cookie sheet and then put the toppings on. In order to make the toppings stick to the dough, you have to mist the dough with a little water first. I cut the dough prior to baking with a pizza cutter and then popped it in the oven. 15 minutes later, I had crackers. GOOD TASTING crackers too, if I do say so myself.

Combine the following ingredients in a 1-quart bowl.
2 cans Black-eyed peas, drained and rinsed
½ c. Green pepper, finely diced
½ c. Tomato, diced
½ c. Red onion, finely diced
½ c. Carrot, finely diced
¼ c. Cilantro, finely chopped
4 Cloves of garlic, minced
2-3 Jalapeño peppers, minced
Marinade: Whisk the following ingredients together and pour over dip ingredients and let marinate for 1 hour in refrigerator.
½ c. Olive oil
4 tsp. White vinegar
1½ tsp. Worcester
1 tsp. Lime juice
1 tbs. Creole seasoning (Tony Chachere’s)
* 1 1/2 cups unbleached bread flour or gluten free flour blend (If you use a blend without xanthan gum, add 1 tsp xanthan or guar gum to the recipe)
* 1/2 tsp salt
* 1/2 tsp instant yeast
* 1 Tb agave syrup or sugar
* 1 Tb vegetable oil
* 1/3 to 1/2 cup + 2 Tb water, at room temperature
* Poppy seeds, sesame seeds, paprika, cumin seeds, caraway seeds, or kosher salt for toppings
1. In a mixing bowl, stir together the flour, salt yeast, agave, oil, and just enough water to bring everything together into a ball. You may not need the full 1/2cup + 2 Tb of water, but be prepared to use it all if needed.
2. For Non Gluten Free Cracker Dough: Sprinkle some flour on the counter and transfer the dough to the counter. Knead for about 10 minutes, or until the ingredients are evenly distributed. The dough should pass the windowpane test (see http://www.wikihow.com/Determine-if-Bre … ong-Enough for a description of this) and register 77 degrees to 81 degrees Fahrenheit. The dough should be firmer than French bread dough, but not quite as firm as bagel dough (what I call medium-firm dough), satiny to the touch, not tacky, and supple enough to stretch when pulled. Lightly oil a bowl and transfer the dough to the bowl, rolling it around to coat it with oil. Cover the bowl with plastic wrap.
or
2. For Gluten Free Cracker Dough: The dough should be firmer than French bread dough, but not quite as firm as bagel dough (what I call medium-firm dough), and slightly tacky. Lightly oil a bowl and transfer the dough to the bowl, rolling it around to coat it with oil. Cover the bowl with plastic wrap.
3. Ferment at room temperature for 90 minutes, or until the dough doubles in size. (You can also retard the dough overnight in the refrigerator immediately after kneading or mixing).
4. For Non Gluten Free Cracker Dough: Mist the counter lightly with spray oil and transfer the dough to the counter. Press the dough into a square with your hand and dust the top of the dough lightly with flour. Roll it out with a rolling pin into a paper thin sheet about 15 inches by 12 inches. You may have to stop from time to time so that the gluten can relax. At these times, lift the dough from the counter and wave it a little, and then lay it back down. Cover it with a towel or plastic wrap while it relaxes. When it is the desired thinness, let the dough relax for 5 minutes. Line a sheet pan with baking parchment. Carefully lift the sheet of dough and lay it on the parchment. If it overlaps the edge of the pan, snip off the excess with scissors.
or
4. For Gluten Free Cracker Dough: Lay out two sheets of parchment paper. Divide the cracker dough in half and then sandwich the dough between the two sheets of parchment. Roll out the dough until it is a paper thin sheet about 15 inches by 12 inches. Slowly peel away the top layer of parchment paper. Then set the bottom layer of parchment paper with the cracker dough on it onto a baking sheet.
5. Preheat the oven to 350 degrees Fahrenheit with the oven rack on the middle shelf. Mist the top of the dough with water and sprinkle a covering of seeds or spices on the dough (such as alternating rows of poppy seeds, sesame seeds, paprika, cumin seeds, caraway seeds, kosher or pretzel salt, etc.) Be careful with spices and salt - a little goes a long way. If you want to pre cut the cracker, use a pizza cutter (rolling blade) and cut diamonds or rectangles in the dough. You do not need to separate the pieces, as they will snap apart after baking. If you want to make shards, bake the sheet of dough without cutting it first.
5. Bake for 15 to 20 minutes, or until the crackers begin to brown evenly across the top (the time will depend on how thinly and evenly you rolled the dough).
6. When the crackers are baked, remove the pan from the oven and let them cool in the pan for about 10 minutes. You can then snap them apart or snap off shards and serve.
Saturday, September 27, 2008
DARING BAKERS Lavash Crackers with LoneStar Caviar
Monday, September 15, 2008
PINEAPPLE ZUCCHINI BREAD

I even got help grating and mixing this recipe!
A few years ago I decided I wanted a new and improved Zucchini Bread. I searched the web and my cookbooks and came up with several good recipes, but nothing that really made me want to make them again. I decided to take what I liked from a comglomeration of recipes and make my own zucchini bread recipe. I think that this recipe is super good and have had nothing but rave reviews from my family and friends that have tried it. CHILD FRIENDLY is what most of my friends are VERY excited about!!! How many little ones do you know that eat zucchini? Hide it in this recipe and they will no matter the age! Hey, you never know, it might be a hit like at our house and the kids want to help you make it!
PINEAPPLE ZUCCHINI BREAD
3 large eggs
2 C. Grated Zucchini
1 C. Vegetable oil
1 C. Crushed Pineapple
1 C. White sugar
1 C. Brown Sugar
2 tsp. Vanilla Extract
3 C. All-Purpose Flour
2 tsp. Baking Soda
1/4 tsp. Baking Powder
1 tsp. Salt
1 1/2 tsp. Ground Cinnamon
3/4 tsp. Ground Nutmeg (optional)
1 C. Raisins, Craisins or Dried Cherries(optional)
1 C. Chopped Nuts (optional)
Directions:
1. Preheat oven to 350 degrees
2. Beat eggs, oil, sugar, and vanilla together until thick, then add zucchini & pineapple
3. Gradually add flour, soda, salt, baking powder, spices, raisins, and nuts into the egg mixture; blend well. Mixture will be running in consistency.
4. Pour batter into two 9x5 inch greased and floured loaf pans. Bake in preheated oven for 1 hour, or until a toothpick inserted into the center of the bread comes out clean. Cool in the pan for 10 minutes then turn out onto a wire rack.
Friday, September 5, 2008
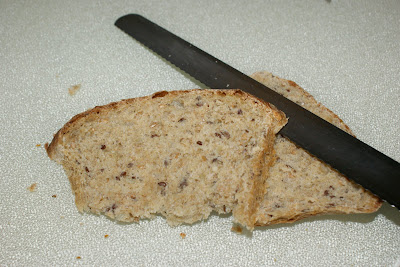
Cracked Wheat Sourdough Bread

 The raw sunflower seed I found at a health mart about 15 miles from home. Well, this bread better be worth it is what I was thinking when I had to travel to several different places just to get the ingredients!!!!

Tuesday, September 2, 2008
My new friend, HERMAN (Sourdough Starter)

DAY 1: (Day you receive Herman) Add 1/2 cup sugar, 1 cup flour and 1 cup milk. Stir well. Store in refrigerator and cover lightly. Stir every day.
DAY 2-4: STIR
DAY 5: Add the same as above and stir. Stir every day.
DAY 6-9 STIR
DAY 10: Remove 1 cup of Herman for yourself and one cup for a friend. Give your friend the above directions on how to care for Herman.
Well, it all seems easy until you open your refrigerator and say to yourself, "When did I stir (or in my case, squish the Ziploc bag) or feed Herman last? Herman is very forgiving, so I am lucky for that!
I have had Herman for over 2 months now and have made so many awesome baked goods with it. The recipes range from coffee cakes, pancakes to lots of great bread recipes. Next week I will post some of the great recipes that I have used with Herman.


