Wednesday, October 29, 2008

The Flour Garden Pizzeria- October Daring Bakers Challenge

That's right, I turned my kitchen into a pizzeria last night! This month's Daring Bakers Challenge was to make Peter Reinhart's Pizza Dough. This recipe comes from his book, "The Bread Baker's Apprentice: Mastering The Art of Extraordinary Bread". The challenge was hosted this month by Rosa from Rosa's Yummy Yums and in honor of a past Daring Baker, Sher at What Did You Eat, who suddenly lost her life to a massive heart attack in July. Never in Daring Bakers history have they made Pizza Dough, so let the challenge begin!

I printed the recipe and directions and carefully planned the perfect toppings for my family and their pizzas. I decided for my pizza I would like to recreate a BBQ Chicken Pizza from a Gourmet Cafe that I just loved when I lived at home. For my kids, that was an easy decision, sauce and cheese for the one; and sauce, cheese and pineapple for the other kiddo. They are not quite the food critics that I would like, but the oldest is starting to appreciate the finer things. The husband likes his pizza just as boring; sauce, pepperoni and cheese. So, I just needed a few toppings that I didn't have in the pantry and I had everything for the pizza dough since I have been the bread Nazi lately.

This recipe is a little time consuming since you have to let the pizza dough rest over night. This is not something that you just decided to do 15 minutes before you want the pizzas going into the oven. But the recipe is straight forward and very basic. If you can operate a Kitchen Aid Stand Mixer, you can make this recipe.

Day One: I broke out the Kitchen Aid Stand Mixer and made the dough. This dough consists of Chilled Flour, Salt, Instant Yeast, Olive Oil, ICE Water and Sugar. Very basic! I was all ready to put the ingredients together and had completely forgotten to chill the flour. Chilling the flour makes the dough blend better from what I understand. I tossed the measured flour into a Ziploc and then into the freezer to chill. About an hour later, I had chilled flour to work with. I mixed the ingredients and then put the dough hook on the mixer and "Kneaded" it for about 6 minutes until the dough was smooth. I pulled the massive dough ball out of the mixer bowl and then divided it into 3 large balls. Then, I transferred it to a greased pan covered with plastic wrap and tossed it into the fridge to chill overnight.

Day Two: The FUN begins. I took the dough out exactly two hours before I planned on making my kitchen a complete mess! A mess that surely made even the Husband want me to clean it up! (That is something that doesn't often happen) I placed 2 of the dough balls onto my floured counter top and pressed the dough into disks and then had to wait for two hours so that the dough was able to rest. About 45 minutes before I was going to make the pizza, I had to preheat the ovens (Yes, I used both ovens) to 500 degrees with the baking stones in the ovens. This is where the story becomes interesting. The little guys starting screaming, the house is on fire. The smoke alarms were going off and the smoke was thickening the air. Ok, I only like putting my oven on "SELF CLEAN" in the winter so that it also heats my house. So, here you find that I obviously have had some boil overs and maybe some fallen crusts that didn't take well to the 500 degree oven. The Husband rolls into the house complaining to whomever will listen, which wasn't any of the three of us, that the house is smokey and the alarms are still going off. Yeah, like we didn't realize that....need I say more? MEN, they just don't get what a woman will do to try new things, they just don't get it! The windows had to be opened, 34 degrees here now, the fans were put on and smoke alarms stripped from the ceilings...yep, the man took control.

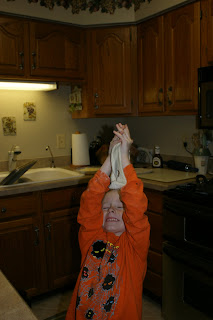
Shortly after the smoke settled, we continued on with making the pizza's. The kids gathered their toppings and were all excited about making their own pizzas. I was also excited. I got the camera out to capture the moment when the pizza dough would land onto my head after attempting to toss it, this actually didn't happen, but did come very close! I put the dough onto my knuckles and started trying to stretch it. I then got up enough guts to toss it into the air. It went sideways and folded into an unknown shape that didn't resemble anything I had even seen at a pizzeria! I smooched the dough back into a disc shape and let it rest for about 15 minutes and reattempted. This time I was successful! It wasn't a toss that was 5 feet into the air, but it did stay into the shape that I desired. Next it was time for the kids....did you think that they weren't going to be involved? Oh yeah, this is when the fun really began! My little guy, G2 we will refer to him as, threw his dough in the air and it came right down on his face. We all couldn't stop the laughing! G1, our oldest son, had a great laugh once his turn came around. He was successful and it didn't take him as much time to get the nak of it as it took me!

G1 and his attempt to toss the pizza
G2 just before his dough landed on his face!

After we got our dough all stretched and spun, we were ready to add the toppings. The directions told us to flip over a jelly pan and then cover it with corn meal and place the dough onto the corn meal. After placing it just right, we were able to add our toppings and place the pizza in the oven. This is where the real challenge started. Once it was time to transfer the pizza from the pan to the 500 degree preheated pizza stone the pizza dough didn't want to move from the pan. I had to pull the dough onto the stone and one of the pizzas was just a disaster and it just happened to be G1's pizza. He was at least mature about the devastation and helped me replace the toppings and pull the dough back onto the stone. Boy did the stone smoke after all the cheese and toppings hit it!! The Husband thought he saw smoke when he got home, not a chance this was smoke!

We cooked these pizzas in my two ovens and once one would come out, we would put another one back in. We had hot pizza that tasted so AWESOME!! I couldn't believe that I actually replicated my favorite BBQ Chicken Pizza from a Gourmet Cafe and I didn't dig myself 6 feet down by doing it either!!!

BBQ CHICKEN PIZZA
Cheese Pizza

This challenge was so very exciting and really brought us together at dinner time. I have already suggested having a pizza making night with my cousin and her children so that we can really a great time and awesome pizza that is truly homemade! Thanks Daring Bakers for challenging me to make something that I never thought of doing. I had a great time this month and cannot wait to see what new recipe November will bring.
Here is the recipe for this awesome crust!
BASIC PIZZA DOUGH
~Original recipe taken from “The Bread Baker’s Apprentice” by Peter Reinhart
Makes 6 pizza crusts (about 9-12 inches/23-30 cm in diameter).

Ingredients:
4 1/2 Cups (20 1/4 ounces/607.5 g) Unbleached high-gluten (%14) bread flour or all purpose flour, chilled
1 3/4 Tsp Salt
1 Tsp Instant yeast
1/4 Cup (2 ounces/60g) Olive oil or vegetable oil (both optional, but it’s better with)
1 3/4 Cups (14 ounces/420g or 420ml) Water, ice cold (40° F/4.5° C)
1 Tb sugar
Cornmeal for dusting

DAY ONE
1. Mix together the flour, salt and instant yeast in a big bowl (or in the bowl of your stand mixer)

2. Add the oil, sugar and cold water and mix well (with the help of a large wooden spoon or with the paddle attachment, on low speed) in order to form a sticky ball of dough. On a clean surface, knead for about 5-7 minutes, until the dough is smooth and the ingredients are homogeneously distributed. If it is too wet, add a little flour (not too much, though) and if it is too dry add 1 or 2 teaspoons extra water
NOTE: If you are using an electric mixer, switch to the dough hook and mix on medium speed for the same amount of time.The dough should clear the sides of the bowl but stick to the bottom of the bowl. If the dough is too wet, sprinkle in a little more flour, so that it clears the sides. If, on the contrary, it clears the bottom of the bowl, dribble in a teaspoon or two of cold water.The finished dough should be springy, elastic, and sticky, not just tacky, and register 50°-55° F/10°-13° C

3. Flour a work surface or counter. Line a jelly pan with baking paper/parchment. Lightly oil the paper

4. With the help of a metal or plastic dough scraper, cut the dough into 6 equal pieces (or larger if you want to make larger pizzas).

5. Sprinkle some flour over the dough. Make sure your hands are dry and then flour them. Gently round each piece into a ball

6. Transfer the dough balls to the lined jelly pan and mist them generously with spray oil. Slip the pan into plastic bag or enclose in plastic food wrap


7. Put the pan into the refrigerator and let the dough rest overnight or for up to thee days.
NOTE: You can store the dough balls in a zippered freezer bag if you want to save some of the dough for any future baking. In that case, pour some oil (a few tablespoons only) in a medium bowl and dip each dough ball into the oil, so that it is completely covered in oil. Then put each ball into a separate bag. Store the bags in the freezer for no longer than 3 months. The day before you plan to make pizza, remember to transfer the dough balls from the freezer to the refrigerator

DAY TWO
8. On the day you plan to eat pizza, exactly 2 hours before you make it, remove the desired number of dough balls from the refrigerator. Dust the counter with flour and spray lightly with oil. Place the dough balls on a floured surface and sprinkle them with flour. Dust your hands with flour and delicately press the dough into disks about 1/2 inch/1.3 cm thick and 5 inches/12.7 cm in diameter. Sprinkle with flour and mist with oil. Loosely cover the dough rounds with plastic wrap and then allow it to rest for 2 hours

9. At least 45 minutes before making the pizza, place a baking stone on the lower third of the oven. Preheat the oven as hot as possible (500° F/260° C).
NOTE: If you do not have a baking stone, then use the back of a jelly pan. Do not preheat the pan

10. Generously sprinkle the back of a jelly pan with semolina/durum flour or cornmeal. Flour your hands (palms, backs and knuckles). Take 1 piece of dough by lifting it with a pastry scraper. Lay the dough across your fists in a very delicate way and carefully stretch it by bouncing it in a circular motion on your hands, and by giving it a little stretch with each bounce. Once the dough has expanded outward, move to a full toss

NOTE: Make only one pizza at a time. During the tossing process, if the dough tends to stick to your hands, lay it down on the floured counter and re-flour your hands, then continue the tossing and shaping. In case you would be having trouble tossing the dough or if the dough never wants to expand and always springs back, let it rest for approximately 5-20 minutes in order for the gluten to relax fully, then try again. You can also resort to using a rolling pin, although it isn’t as effective as the toss method.

11. When the dough has the shape you want (about 9-12 inches/23-30 cm in diameter - for a 6 ounces/180g piece of dough), place it on the back of the jelly pan, making sure there is enough semolina/durum flour or cornmeal to allow it to slide and not stick to the pan

12. Lightly top it with sweet or savory toppings of your choice.

13. Slide the garnished pizza onto the stone in the oven or bake directly on the jelly pan. Close the door and bake for about 5-8 minutes

Friday, October 17, 2008

Win a BEAUTIFUL quilt!

Hurry on over to http://pigtailsandsnails.blogspot.com/ and all you have to do it leave a comment about her quilt post! That only earns you one entry. For more entries, sje will give 5 additional entries for posting about the giveaway on your very own blog. She will also give another 5 entries for posting the banner below in your sidebar. If you don't win the quilt, she will be giving away a very special 2nd and 3rd place prize, THE PATTERN TO THE QUILT. I know just how complicated making a quilt is, so I really appreciated the fact that she has taken the time to complete it, and then GIVE IT AWAY! I hope I win or even you too! HURRY, it ends today ;}

Wednesday, October 1, 2008

BREAST CANCER AWARENESS MONTH!

October 1st marks the beginning of Breast Cancer Awareness Month. This is a very important month to all women and especially those that are high risk due to family history. One week before I was born, (29 years ago +/-) my maternal grandmother had a mastectomy. She won her battle with breast cancer and went on to live another 16 years until she lost her life to another form of cancer. Without having her yearly exam, she wouldn't have known that she had breast cancer. She caught it in time to be able to go on with her life and to see 5 grandchildren born.
It is very sad to think that I could lose my mother to this horrible disease too! This is why you should make sure that you have a physical and mammogram done on a yearly basis. If you don't have insurance or your insurance doesn't pay for it, click on one of the links I have posted.

Saturday, September 27, 2008

DARING BAKERS Lavash Crackers with LoneStar Caviar

This month's Daring Bakers Challenge was to make Lavash Crackers and create a dip/spread/salsa/relish to accompany it. I was like a deer in head lights, what do you mean?? Crackers, seriously, no cake, danish or other baked sweet goods? I had a bad attitude about it until I really started thinking about what I would make. I started digging through the recipe box and looking at all my saved goodies online. I finally decided to make whole wheat lavash crackers topped with garlic powder, kosher salt, poppy seeds and also some sesame seeds. I decided to make a salsa recipe called LoneStar Caviar that my dear friend Laura had given me years ago for the topping.

I got going on the crackers only to find that another trip to the store was in my future. I didn't have the instant yeast that it called for. When I returned, I got down to business and mixed up the lavash dough. It looked much more complex on paper than it really was. I let the dough rise for about a hour and a half and then rolled it out. I placed it on parchment paper on a large cookie sheet and then put the toppings on. In order to make the toppings stick to the dough, you have to mist the dough with a little water first. I cut the dough prior to baking with a pizza cutter and then popped it in the oven. 15 minutes later, I had crackers. GOOD TASTING crackers too, if I do say so myself.
For the LoneStar Caviar I had to chop, dice and just open up a couple of cans of beans. HOW EASY. The caviar was so tasty that I was eating it by the spoonful! This was a very fun challenge this month and I am glad that I was able to make something that was not only tasty, but also was a bit healthy too! LONESTAR CAVIAR
Combine the following ingredients in a 1-quart bowl.
2 cans Black-eyed peas, drained and rinsed
½ c. Green pepper, finely diced
½ c. Tomato, diced
½ c. Red onion, finely diced
½ c. Carrot, finely diced
¼ c. Cilantro, finely chopped
4 Cloves of garlic, minced
2-3 JalapeƱo peppers, minced

Marinade: Whisk the following ingredients together and pour over dip ingredients and let marinate for 1 hour in refrigerator.
½ c. Olive oil
4 tsp. White vinegar
1½ tsp. Worcester
1 tsp. Lime juice
1 tbs. Creole seasoning (Tony Chachere’s)The recipe for 1 sheet pan of Lavash Crackers is as follows:
* 1 1/2 cups unbleached bread flour or gluten free flour blend (If you use a blend without xanthan gum, add 1 tsp xanthan or guar gum to the recipe)
* 1/2 tsp salt
* 1/2 tsp instant yeast
* 1 Tb agave syrup or sugar
* 1 Tb vegetable oil
* 1/3 to 1/2 cup + 2 Tb water, at room temperature
* Poppy seeds, sesame seeds, paprika, cumin seeds, caraway seeds, or kosher salt for toppings

1. In a mixing bowl, stir together the flour, salt yeast, agave, oil, and just enough water to bring everything together into a ball. You may not need the full 1/2cup + 2 Tb of water, but be prepared to use it all if needed.

2. For Non Gluten Free Cracker Dough: Sprinkle some flour on the counter and transfer the dough to the counter. Knead for about 10 minutes, or until the ingredients are evenly distributed. The dough should pass the windowpane test (see http://www.wikihow.com/Determine-if-Bre … ong-Enough for a description of this) and register 77 degrees to 81 degrees Fahrenheit. The dough should be firmer than French bread dough, but not quite as firm as bagel dough (what I call medium-firm dough), satiny to the touch, not tacky, and supple enough to stretch when pulled. Lightly oil a bowl and transfer the dough to the bowl, rolling it around to coat it with oil. Cover the bowl with plastic wrap.

or

2. For Gluten Free Cracker Dough: The dough should be firmer than French bread dough, but not quite as firm as bagel dough (what I call medium-firm dough), and slightly tacky. Lightly oil a bowl and transfer the dough to the bowl, rolling it around to coat it with oil. Cover the bowl with plastic wrap.

3. Ferment at room temperature for 90 minutes, or until the dough doubles in size. (You can also retard the dough overnight in the refrigerator immediately after kneading or mixing).

4. For Non Gluten Free Cracker Dough: Mist the counter lightly with spray oil and transfer the dough to the counter. Press the dough into a square with your hand and dust the top of the dough lightly with flour. Roll it out with a rolling pin into a paper thin sheet about 15 inches by 12 inches. You may have to stop from time to time so that the gluten can relax. At these times, lift the dough from the counter and wave it a little, and then lay it back down. Cover it with a towel or plastic wrap while it relaxes. When it is the desired thinness, let the dough relax for 5 minutes. Line a sheet pan with baking parchment. Carefully lift the sheet of dough and lay it on the parchment. If it overlaps the edge of the pan, snip off the excess with scissors.

or

4. For Gluten Free Cracker Dough: Lay out two sheets of parchment paper. Divide the cracker dough in half and then sandwich the dough between the two sheets of parchment. Roll out the dough until it is a paper thin sheet about 15 inches by 12 inches. Slowly peel away the top layer of parchment paper. Then set the bottom layer of parchment paper with the cracker dough on it onto a baking sheet.

5. Preheat the oven to 350 degrees Fahrenheit with the oven rack on the middle shelf. Mist the top of the dough with water and sprinkle a covering of seeds or spices on the dough (such as alternating rows of poppy seeds, sesame seeds, paprika, cumin seeds, caraway seeds, kosher or pretzel salt, etc.) Be careful with spices and salt - a little goes a long way. If you want to pre cut the cracker, use a pizza cutter (rolling blade) and cut diamonds or rectangles in the dough. You do not need to separate the pieces, as they will snap apart after baking. If you want to make shards, bake the sheet of dough without cutting it first.

5. Bake for 15 to 20 minutes, or until the crackers begin to brown evenly across the top (the time will depend on how thinly and evenly you rolled the dough).

6. When the crackers are baked, remove the pan from the oven and let them cool in the pan for about 10 minutes. You can then snap them apart or snap off shards and serve.

Monday, September 15, 2008

PINEAPPLE ZUCCHINI BREAD


I even got help grating and mixing this recipe!

A few years ago I decided I wanted a new and improved Zucchini Bread. I searched the web and my cookbooks and came up with several good recipes, but nothing that really made me want to make them again. I decided to take what I liked from a comglomeration of recipes and make my own zucchini bread recipe. I think that this recipe is super good and have had nothing but rave reviews from my family and friends that have tried it. CHILD FRIENDLY is what most of my friends are VERY excited about!!! How many little ones do you know that eat zucchini? Hide it in this recipe and they will no matter the age! Hey, you never know, it might be a hit like at our house and the kids want to help you make it!

PINEAPPLE ZUCCHINI BREAD
3 large eggs
2 C. Grated Zucchini
1 C. Vegetable oil
1 C. Crushed Pineapple
1 C. White sugar
1 C. Brown Sugar
2 tsp. Vanilla Extract
3 C. All-Purpose Flour
2 tsp. Baking Soda
1/4 tsp. Baking Powder
1 tsp. Salt
1 1/2 tsp. Ground Cinnamon
3/4 tsp. Ground Nutmeg (optional)
1 C. Raisins, Craisins or Dried Cherries(optional)
1 C. Chopped Nuts (optional)

Directions:
1. Preheat oven to 350 degrees
2. Beat eggs, oil, sugar, and vanilla together until thick, then add zucchini & pineapple
3. Gradually add flour, soda, salt, baking powder, spices, raisins, and nuts into the egg mixture; blend well. Mixture will be running in consistency.
4. Pour batter into two 9x5 inch greased and floured loaf pans. Bake in preheated oven for 1 hour, or until a toothpick inserted into the center of the bread comes out clean. Cool in the pan for 10 minutes then turn out onto a wire rack.

Friday, September 5, 2008

Cracked Wheat Sourdough Bread

When I started my sourdough starter a few months ago, I would have never imagined all the recipes that I would make with it. I came across this recipe while I was on one of my favorite recipe websites, Allrecipes.com . For all of you that don't know me, I can tell you that grains are NOT something that I am attracted to. I am a WHITE bread person and don't feel like pushing grainy bread into my mouth nor my children's mouths. The DH rips on me all the time about this issue and I am now trying to turn over a new leaf.


So, while the search for ways to create new "Herman" creations was underway, I found this recipes for Cracked Wheat Sourdough bread. It was given 5 out of 5 stars and almost every review just raved about the wonderful taste and texture. I thought to myself, "Hum, this might be a way to butter up the husband". I printed the recipe and went on a little trip to the grocery store. Well, the trip turned out to be a long one because I didn't know where to buy 2 of the items on the list. I needed cracked wheat and RAW sunflower seeds. I went to the health food store here in town and the lady had never even heard of the cracked wheat (real rocket scientist, huh?) and didn't have the raw sunflower seeds. After 4 stores, I went home and started calling places. I finally found the cracked wheat at a market that is just north of town. The brand of the Wheat was Bob's Red Mill and it was called Cracked Wheat Hot Cereal. The raw sunflower seed I found at a health mart about 15 miles from home. Well, this bread better be worth it is what I was thinking when I had to travel to several different places just to get the ingredients!!!!

All ingredients were now all purchased and waiting for me to whip up this beautiful grainy bread that wouldn't probably pass through my lips. I got the ole' bread machine out and started adding all the ingredients into the loaf pan. I then selected the dough cycle and pressed START. Well, since this bread machine had never seen anything but white flour I didn't know how hard the machine was going to have to work.....needless to say, I transferred it to my Kitchen Aid mixer bowl and used the dough hook. It really worked well in the Kitchen Aid mixer, so I will steer away from the machine for heavier breads next time. I got all the flour mixed in and then had to allow the dough to rise twice and then transfer the dough into two 9X5 loaf pans and allow to rise again. After all the waiting, the bread dough was ready to bake. The smell that was coming out of the oven was very pleasant and made me feel like I was in a bakery. I pulled the bread out of the oven after about 30 minutes and transferred to wire cooling racks. I left the loaves for the husband to enjoy the next morning.
The next day when I woke, I found a note from the husband telling me that the bread was GREAT! I even ate several pieces....can you believe that???

Tuesday, September 2, 2008

My new friend, HERMAN (Sourdough Starter)

About 2 months ago I came across a recipe that called for HERMAN for one of the ingredients. I mentally dug back into the achieves of my childhood and remembered my mom doing something with a substance named Herman. I asked her about it and then all my memories of Herman became vivid. Herman is a sourdough starter that she used to make bread, coffee cakes and other baked goodies. She would stir it everyday and "feed" it every five days. Then she would also take some out and pass it along for her friends to "grow" in their refrigerators too! One time Herman was a little neglected and decided to grow out of his bowl and make a complete disaster out of our clean fridge. These are the memories that became so vivid to me about Herman. So, you ask what I did next? Well, I searched the web for the recipe to begin my own Herman, of course! What was I thinking? I was thinking that all the work that she put into making this starter proved to be worth while since everything that she made with it was awesome.


After searching for the recipe I came across the Herman Sourdough Started Recipe on Allrecipes.com. I quickly whipped it up and eagerly waited for the starter to be ready, this took only 15 days....imagine my anticipation!
15 Days later my starter had "brewed" with an alcohol content that is probably more than a normal bottle of beer has! Now it was time to start feeding and looking for recipes to turn Herman into. The feeding schedule is quite easy:

DAY 1: (Day you receive Herman) Add 1/2 cup sugar, 1 cup flour and 1 cup milk. Stir well. Store in refrigerator and cover lightly. Stir every day.
DAY 2-4: STIR
DAY 5: Add the same as above and stir. Stir every day.
DAY 6-9 STIR
DAY 10: Remove 1 cup of Herman for yourself and one cup for a friend. Give your friend the above directions on how to care for Herman.

Well, it all seems easy until you open your refrigerator and say to yourself, "When did I stir (or in my case, squish the Ziploc bag) or feed Herman last? Herman is very forgiving, so I am lucky for that!

I have had Herman for over 2 months now and have made so many awesome baked goods with it. The recipes range from coffee cakes, pancakes to lots of great bread recipes. Next week I will post some of the great recipes that I have used with Herman.
Let me know if you want a cup of Herman to get you started!!!